BerconTile 3.02 by Jerry Ylilammi is a versatile texturemap for 3dsMax 2012. Since a few updates this map has changed significantly. In this article I’d like to show a few ways how to use the berconTile texturemap. It’s by no means a complete reference of all the functions but it should help out users to make it work for them.
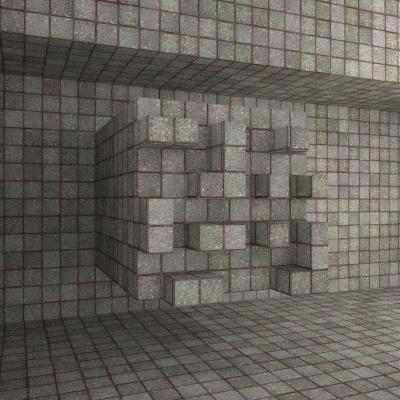
Find general info on berconTile, multiTexture and the downloads for this set of maps on the site of Jerry Ylilammi. BerconTile has some very easy to understand settings, other settings may take a bit of tweaking to get right. I’ve needed quite some time to understand how the UV-mapping within this map works.

|
TilingThese settings haven’t really changed over time, but they’re very important to the appearance of the tiles. The Size-parameter scales the entire map. The Width and Height parameters determine the size of a single tile. Note that not for every patterntype these sizes are taken precisely. |
 |
ColorsColor #1 is the color of the tile. This is the color you’re most likely to put another texturemap in. Color #2 and the edge colors both determine the edges and the blending colors. In previous versions you could use color #2 to add variation to the body-color of the tile. I couldn’t get this to work in the same way as before. The possibilities to do this have been expanded quite a bit, so it works a bit differently. |
 |
Tile UV mapping typesThis section is the thing that really sets berconTile apart from the default tile-map. Each single tile in berconTile can have its own UV-coordinates. This is also the section that has gotten a lot of attention in the update. You can switch the UV-mapping on and off, choose a specific type of mapping and set the UV-channel. Especially setting the right channel is very important. |
 |
Tile UV mapping randomizationYou can randomize the UV-coordinates for every single tile. These settings speak for themselves. |
 |
Tile UV mapping Center mappingThis setting replaces what previously had been named “Variation”. You can give each tile a solid color which is derived from another map, such as a noise, gradient or bitmap. This enables you to make mosaic-type images or create powerful masks. You should also pay attention to set the right mapping channel. |
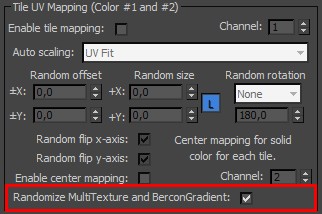 |
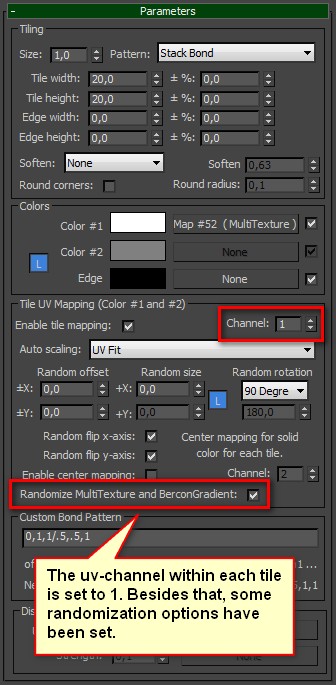
Tile UV mapping RandomizeberconTile plays well with two other maps by Jerry Ylilammi: Multitexture and Bercongradient. Multitexture is a texture written for CG-source. It’s been designed to randomize a set of bitmaptextures such as individual floorboards on separate objects or materialID’s. Now it’s also possible to randomize separate textures on individual tiles. This is a major improvement and key-feature of the new berconTile. |
Examples
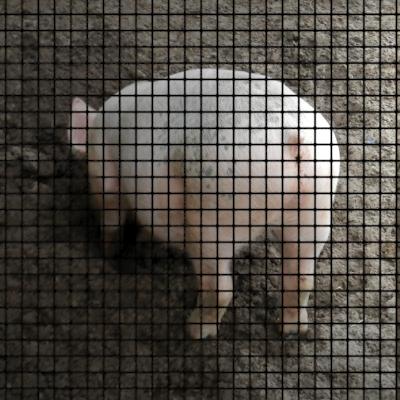
In this example I’ve applied an image to the color #1 slot. The plane is about 500 units and has a UVW modifier with the size of 1.0. The tiles are 20 units. To get the image of the working you need to pay attention to the mapping-coordinates. You can either use the same coords you use for the tiles: 1.0. This means you have to tile the image 1/500 (the plane is 500 units). You can also use a second UVW modifier on channel 2 and set the bitmap to the same channel to control the mapping in a more flexible way.
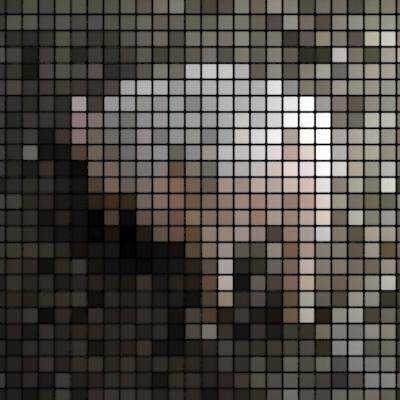
This example uses the “Enable center mapping” option. The bitmap still is applied to Color #1. The result is a mosaic type of image. You need to set the channel of this option to the same channel you’ve set the bitmap to, in this case channel 2. Now comes the hard part: when using this option, the mapping coords from the tiles themselves are applied even if they’re on another channel. Any extra mapping coordinates from UVW modifiers on that channel (number 2 in this example) are ignored. This is a bit confusing. It means we have to set the mapping channel of the image of the pig to 2 and set the tiling to 0,002 (1/500). You can even delete the second UVW modifier you might have added. It’s not used in this setup.
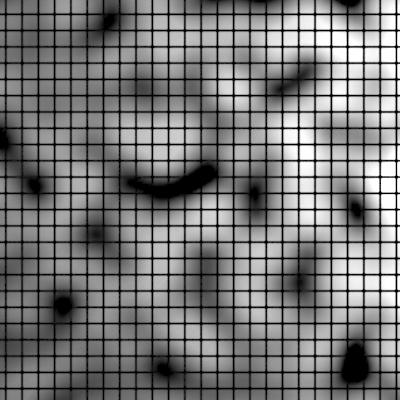
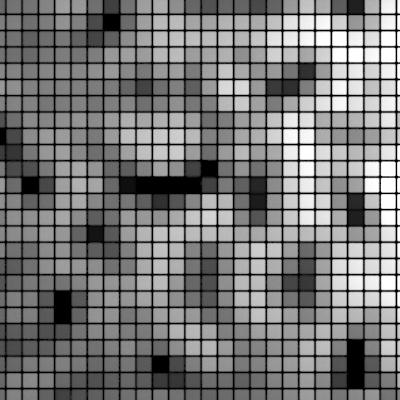
Similar to the pig (bitmaptextures) is the use of procedural maps together with the tiles-map. Again you need to pay attention to the mapping.
Multitexture
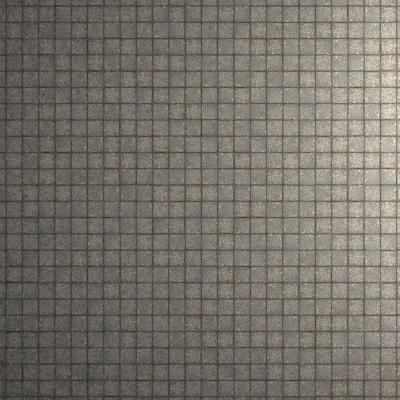
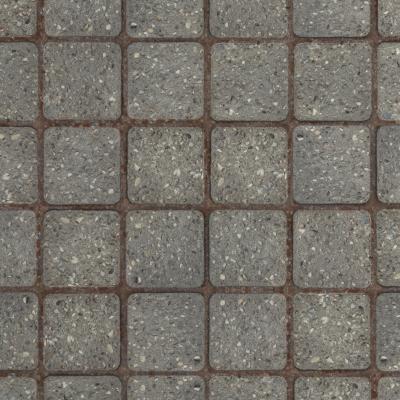
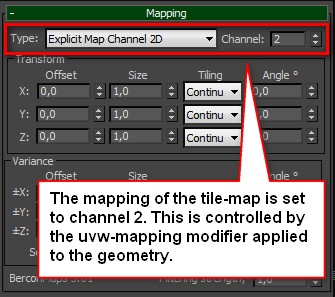
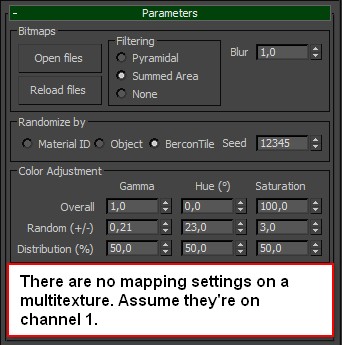
BerconTile works very well together with multitexture. You can randomize single textures across the individual tiles. This makes it very useful for wooden floors, brick walls, any tiling surface. The multiTexture doesn’t support mappingchannels. At least there’s no option to change the mappingchannel. I’m assuming the multitexturemap uses the channel 1 by default. I’m getting good results when I set the UV-tile map of the berconTile to 1 and the mapping of the tilemap itself to 2. Again this is a bit counter-intuitive.
So you load a set of separate bitmaptextures, concrete tiles in this example, and by setting the right switches you can have a randomized pattern without any visible tiling. Multitexture lets you randomly adjust each tile with a gamma, hue and saturation setting.
Multitexture setup




22 Comments
Join the discussion and tell us your opinion.
Great article, many thanks. Great imporvements have been made since the first release !
I am trying to like Bercon but it is soooo damn stupid if youa re going for metric real size scenes…
It is design so so so counter-intuitive…
better keep the floorgen-multiTex workflow as i can transfer scenes and mats from scene to scene without trying to figure out what the heck it is about….
The viewport and render visuals dont match at all… it always wants to use the face’s width-lenght ratio, and if u happen to correct the ratiot with an UV ma modifier, the viewport does not reflect that…
great tool, but bump is not working they way how it is supposed too. Same texture looks correct in diffuse, relf, displacement slot, but i not n in the bump slot? it gets inverted somehow. The texture used for the tiles is now in the edges? why? MAX 2012 and Vray 2.10.01
Yes, I also get weird bump results. When setting the “Soften” setting in the tiling options group to “None” or setting the soften value to 0.0 I get no bump at all from the texture which is in color slot #1. If you put the texture in color slot #2 you do get a bump from it. But the bump results seem a bit awkward, just like you describe.
I’ve found that if you disable the “Random flip x (or y) axis” options, the bump result looks like it should. Does this help?
exactly, but putting the texture in slot2 has the effect of no bump for edges any longer :/ it will be on the whole surface. But why is ti working for displacement? it seams to be only wrong in the bump slot.
it is working now, slot 1 2 3 are mixed up somehow.
http://s21.postimg.org/pcqjsgg2v/bercon.jpg
I don’t get it work with bmultitexture… what’s the mapping for the plane? ist it set to realworld?
thanks
themaxxer
In my example I’ve used a planar UVW mapping modifier with a size of 1 by 1 and set the mapping channel to 2. This has to correspond to the mapping channel of the multitexture map (also set that to 2). The tilemapping in the bercontile map uses channel 1.
I haven’t used realworld mapping coordinates in my example.
Hello and thanks for the explanation. There’s one thing that I fail to use. I’m trying to offset randomly the tile map so there’s more variation while I’m using only one or two tilemaps.
Actually, the random offset in Y doesn’t work at all, while the random offset in X shifts the mapping in both directions. In my case, I want to offset the map only in Y direction.
Thanks!
Hi Clement, why don’t you post a screenshot of your settings here?
Here is the screenshots (hope the links are ok), the map chosen isn’t the best example but as it’s not tileable in any direction, we can see the seams of the repetition :
Plane UVW :
Lien vers mon image
BerconTile settings :
Lien vers mon image
Without offset :
Lien vers mon image
With offset in X
Lien vers mon image
With offset in Y :
Lien vers mon image
Thanks for the support
Clement, I can confirm what you’re reporting. It seems to be a bug. I don’t have a solution for this actually.
Thanks for your quick answer! The only solution I see is using tileable maps to use offset in X, or creating enough different maps in photoshop and use multitexture to get enough variation overall.
I’m trying to learn and practice Vray on my own to work in architectural visualization. Have you any advice or good website where I could exchange and improve my skills?
(If this type of question is not meant to be here, I’m sorry!)
Hi Mr. Klaas Nienhuis, thank you for sharing bercontile. do you have any latest version? i have problem with edge. i can’t see the bump in the rendering.
this is my email add: artiscool15@gmail.com
thank you
Hi Rhed, I’m not the developer of Bercontile. I just wrote a tutorial. You can download it here: http://www.ylilammi.com/2013/09/berconmaps/
Hello Klaas,
Does Bercon Tiles support 3ds Max 2020?
Hi Jason, I’m not the author of the plugin (I just wrote a few tutorials). It’s actually open source: https://github.com/Bercon/BerconMaps. Looking at it, there’s no binary for 2020 yet. But you could submit an issue for it.
Can I use Ver con Roles as a más?
put the texture into vraycolor2bump then to bump channel and it should work like normal
THIS TOOL IS FRUSTRATING AS PAIN. Is impossible to acheive the correct maping for posterior map rendering, and to be correct size on the rendering for testing purposes… Always I’m getting so stressed out with this tool…
You know where to find some examples with values, you have a figure with several variations, but it’s very difficult to know which value to change