This Object2VR tutorial for 3ds Max shows you the basics of creating renders in a spherical pattern in 3ds Max and using them in Object2VR. The result is a rendered and interactive item for online use. I’ve updated the script greatly in 2017 since it was released in 2010. It’s still free though!
Drag the mouse to rotate the model
Overview
In general there are five steps when creating a rotator with 3ds Max and Object2VR. My script helps with step 2 and 4: create the renders and manage them to line up nicely.
- build a 3d model in 3ds Max
- render images in a spherical pattern
- create a project in object2VR
- input the renders and make sure they line up
- export a flash, html5 of quicktime output for use on a website
Check out the video of this Object2VR tutorial
Walkthrough
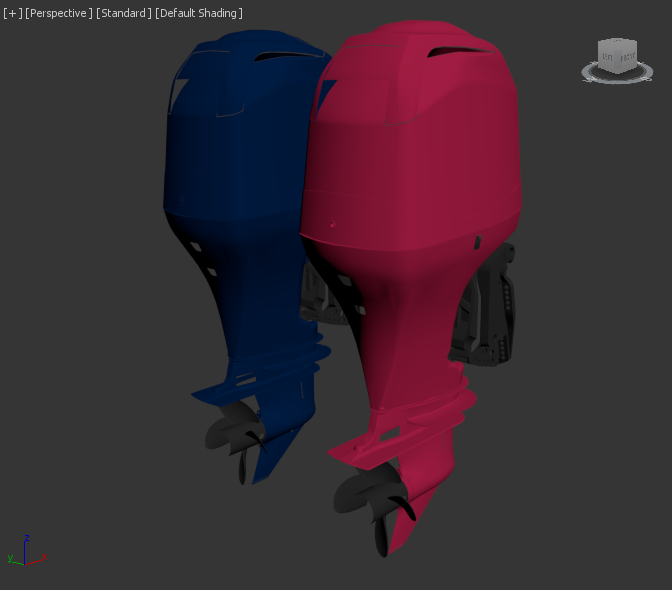
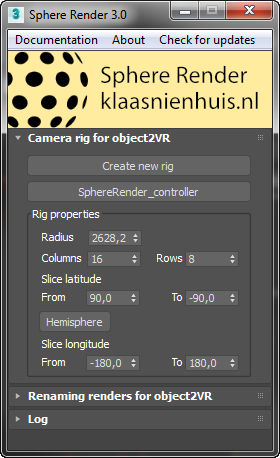
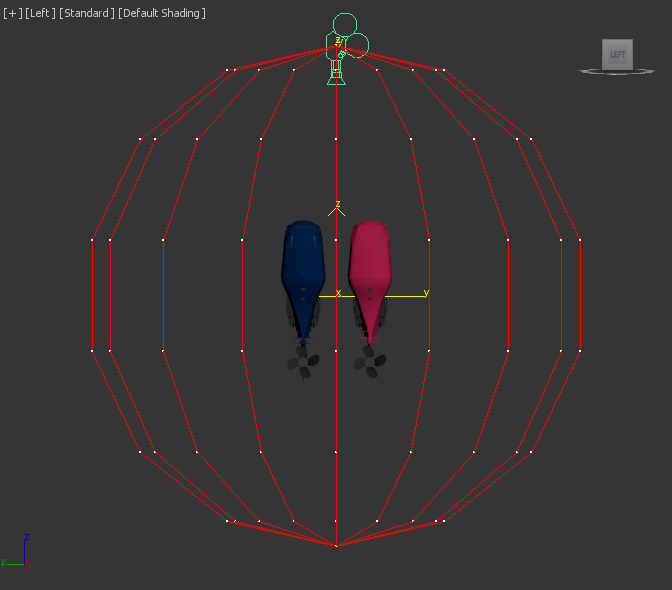
First, open a 3D model in 3ds Max. I’m using a pair of engines in this tutorial. Then open the script. If you haven’t yet, get it here. First you need to create the spherical camera. In fact it’s a single camera which is connected to a small rig. The rig is animated and the camera is attached to it. You can easily attach a different camera to the rig if you’re using a specific render engine. The rig has a center and a radius. If you have a large object, you need a large radius. If the object is small, you can use a small radius. The amount of animated frames is determined by the columns and rows. It’s easiest if you just create the rig and then adjust the radius, columns and rows values.
Rendering and frames
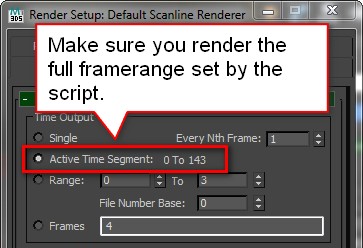
The script adjusts the active framerange after creating a camera. The amount of frames is determined by the amount of columns and rows. Let’s assume you have 16 columns and 8 rows. the script creates 16 x 8 = 128 frames. The active framerange is set to 0-127. When rendering, make sure you render exactly these frames, not less and not more.
Rendering is not controlled by the script. Only the animated rig with camera has been created. You can render any way you like: locally, with backburner or another render-manager. It doesn’t matter, as long as you render the correct framerange. You can also use any other renderengine you want. The script creates a standard camera, but you can easily attach another type of camera to it and render from the other camera.
Rendering is not controlled by the script. Only the animated rig with camera has been created. You can render any way you like: locally, with backburner or another render-manager. It doesn’t matter, as long as you render the correct framerange. You can also use any other renderengine you want. The script creates a standard camera, but you can easily attach another type of camera to it and render from the other camera.
Renaming
When the images have been rendered, they have consecutive filenames. You need to rename these images for object2VR to recognize the column/row structure. Luckily my script helps with that! Open up the script again and in the renaming section of the script, point to the folder containing the images. After that, set the amount of columns and rows to the amount you used when rendering the images. These numbers might not match up with the default settings, keep that in mind. You can also get the number of columns and rows by pressing the “Pick columns and rows from camera rig” button and then picking the helper at the center of the sphere. Renaming only works if all files have been rendered and if the numbers match up. If you’re satisfied with the settings press the button “Rename images, object2VR” to rename the files.
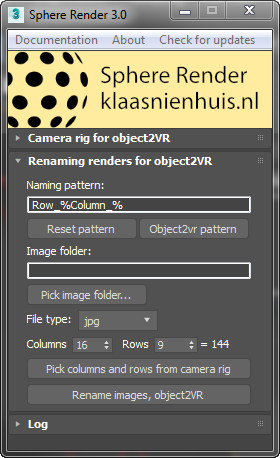
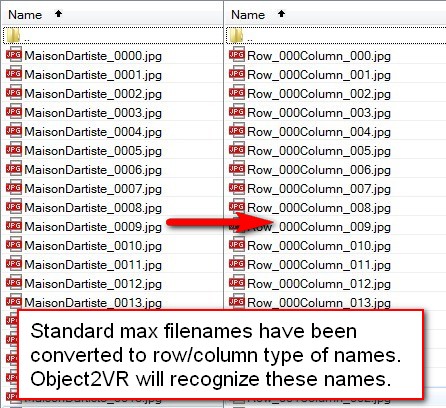
The renamer uses a pattern to rename the images. You can just use the default pattern. Only change this if you know what you’re doing. Later on we’ve got to match up the 3ds Max pattern to the name-pattern in object2VR. I’m assuming you don’t change the naming pattern in 3ds Max for the sake of this tutorial.
Object2VR
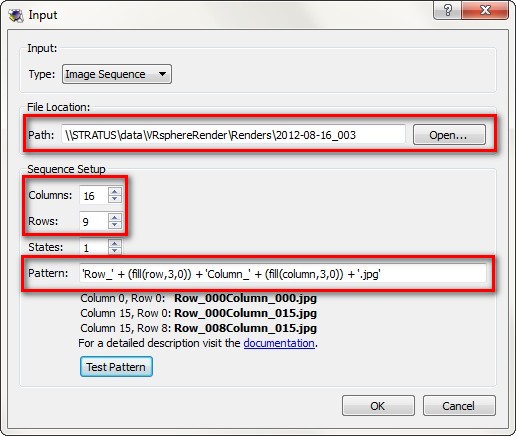
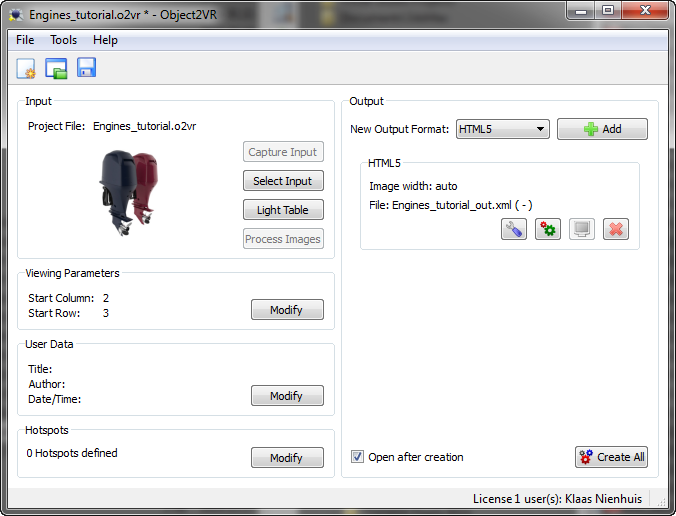
Now open up object2VR and create a new project. First click the “Select input” button. In the popup, select the “Image sequence” option, since we’ve just rendered and renamed the image sequence. Select the path to the folder your images are stored in and set the “Columns” and “Rows” to the amounts you’ve used in 3ds Max. After that set the correct “Pattern”. Object2VR uses the pattern to recognize the column and row structure. The pattern you use here has to match up with the output of the script. This doesn’t mean the pattern is exactly the same. If you haven’t changed the pattern in the script, you can use the following pattern in object2VR:
'Row_' + (fill(row,3,0)) + 'Column_' + (fill(column,3,0)) + '.jpg'
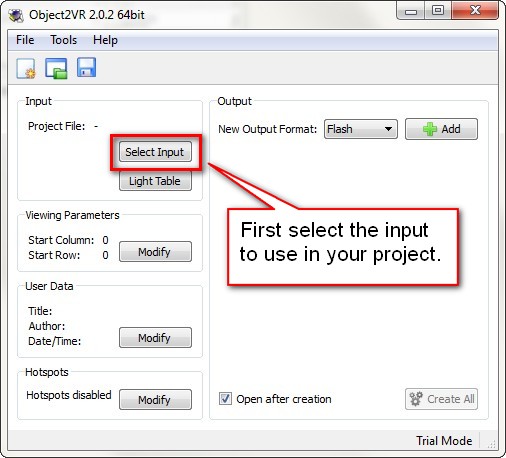
After successfully adding the input, you can create the output. the output is the rotator. Object2VR can create different types of output: flash, html5 and quicktime. You can create either one or all of them using the same images.

12 Comments
Join the discussion and tell us your opinion.
First of all, i really appreciate your support about this fantastic plugin,you r awesome with your knowledge about 3D Max and another software.
This time i need your help about the VR Sphere render,i just need to make render only for a haft of sphere,it means i will use this for rotating object 360 degree and no need to see bottom part.
I dont know my explain is clear or not ,wtll stay hold and wait for your help.
Thanks Klaas and sorry to bother you this time.
Regards,
Duy
Thanks Duy, that’s very kind. If you only want to render the top half of the sphere, you can enable the “Hemisphere” option in the script. It’s only available for the object2VR section.
I hope this helps
Excellent Klaas,you re now my hero :).Many thanks for your help.Im very appreciate.
Regards,
Duy
Hi Klaas Nienhuis,
First of all thank you for this script.
I have one question, if I only need a rotation in the xy axis (no need to “fly” to see the top or the bottom of the object I only need to see the sides) How should I proceed ?
I tough that only had to use one row and several columns but the problem is that the sequence starts on top.
Can you help me ?
Thanks in advance,
Correntes
Hi Correntes,
I’m afraid the script doesn’t support your scenario. You could hack the generated frames by erasing frames and compressing the timeline but that seems way to complex. If you only need one row, you can animate the camera yourself in a circle around your object and just render the frames. After that I think you can even use the script to rename the frames.
Does this help?
Klaas
Klaas,
Thanks for the reply. It helped.
Very interesting stuff on you site by the way.
Once again thank you for sharing knowledge.
Cya
Correntes
Hi,
Great Script was exactly looking for this, Was wondering even if this is the best solution even today?
Also renaming is not working It gives and error “Please fix the renaming first” anything i am missing?
Hey Utsav,
if this is the best solution depends on what you need. If you need realtime 3D then you’d be better off with something like clara.io or sketchfab. If you need rendered quality, then this is a pretty good solution.
About the renaming issue: make sure there are no other files in the folder. Only the rendered images.
hi man do you know any solution that we can animate the perspective mod to orthographic projection mod whit a value of (0-100)
Hi Jaki, I’m not sure what you mean with “perspective mod”. If you’re talking about the perspective and ortho camera in 3dsMax, then no. You can’t animate between these properties. What you can do however, is animate the focal length or FOV of a camera. A camera lens with a very high focal length (a big tele-lens) approximates an ortho cam.
I hope this helps.
Hi Klaas,
How can I send a file to my client from object2vr to put on their website ?
I’m not sure, the best place to ask is on the site of object2vr